Start with cameras covering entrances and exits, point of sale, and any blind corners, then design each camera to a clear objective: detect, recognize, or identify. Exact lens and distance depend on that objective, guided by pixel density. Document the purpose of every camera, limit collection to what you need, and avoid private areas and neighbouring property.
TL;DR:
- Identification requires roughly 40 pixels across a face, so a closer 1080p camera can outperform a distant 4K unit at a doorway.
- Use narrow views at tills and entrances for identification; wide angle cameras suit sales floor observation, not dependable face detail.
- Document each camera’s purpose, location, and field of view, set a retention period, and keep footage off sidewalks, neighboring properties, and private spaces.
- Protect recordings by locking the recorder, encrypting stored footage, restricting access by staff role, logging system access, and adding backup power.
- Choose low light performance or wide dynamic range for glass entrances; infrared preserves darkness at night, while white light can add glare.
A good layout starts with a walk-through of your site, zone by zone, matching each camera to a job rather than a generic spot on the ceiling.
A small retail shop typically needs a few entrance cameras, some covering registers, and several cameras total for the sales floor and stockroom. A small office usually needs coverage at key access points such as the main entrance, reception area, and doors guarding sensitive records or equipment.
Pro Tip: Walk the space at the time of day you’re most worried about, since afternoon glare through a west-facing window can wash out a face that looked clear on a morning test.
Camera placement works backward from the job each lens has to do. Security planners describe four objectives, often shortened to DORI: detect (notice that something happened), observe (follow general activity), recognize (tell if someone is likely known to you), and identify (get enough detail to use in an investigation or in court). The RCMP’s GCPSG-011 guidance recommends planning placement around these objectives and using pixel density models instead of relying on a camera’s marketed resolution.
The practical rule of thumb: you need roughly 40 pixels across the width of a human face for reliable identification, a standard drawn from IEC 62676-4 pixel density guidance. A 4K camera mounted too far from a doorway can still fail this test, while a modest 1080p camera placed closer can pass it easily.
Several planning tools exist to calculate pixel density before you buy hardware, and asking an installer to run this calculation for each camera position avoids paying for resolution you cannot actually use.
Form factor matters as much as placement. Dome cameras suit indoor ceilings because the housing resists tampering and hides which direction the lens is pointed. Bullet cameras work well for long outdoor views along a fence line or driveway, where their shape signals visible deterrence. Pan-tilt-zoom (PTZ) units fit large open areas like a warehouse floor or parking lot where a guard or monitoring service needs to actively follow activity. For areas where you aren’t sure of the exact distance until installation, a varifocal or motorized lens lets you adjust later. When distance is fixed and known, a fixed lens is simpler and cheaper.
Pro Tip: Match the camera to the hardest condition it will face, not the average one, since a loading dock camera has to work in glare, rain, and full darkness on different days of the same week.
Mounting height and cable protection matter as much as camera choice, since a well-placed lens is useless if the footage is tampered with or lost.
The RCMP’s guidance notes that locked equipment, encryption, and audit logs are inexpensive safeguards that meaningfully cut both physical tampering risk and cyber exposure to recorded footage.
Camera placement and privacy compliance are the same decision, not two separate steps. The Office of the Privacy Commissioner of Canada expects businesses to collect only the minimum footage necessary and to document the purpose, location, and field of view for every camera before it goes live. Ontario’s Information and Privacy Commissioner adds that you should use as few cameras as the job requires and disable pan or zoom features where they would sweep in personal information you don’t need.
The regulator’s own enforcement record backs this up: the OPC’s 2010 investigation into a business’s camera placement led to an order relocating cameras away from shared common areas and away from public sidewalks, a reminder that over-collection creates real regulatory exposure, not just a theoretical one. When a camera’s field of view is in any doubt, our workplace video surveillance laws overview and a PIPEDA compliance checklist are useful starting points, and a borderline case is worth a quick call to legal or HR counsel before you drill a single hole.
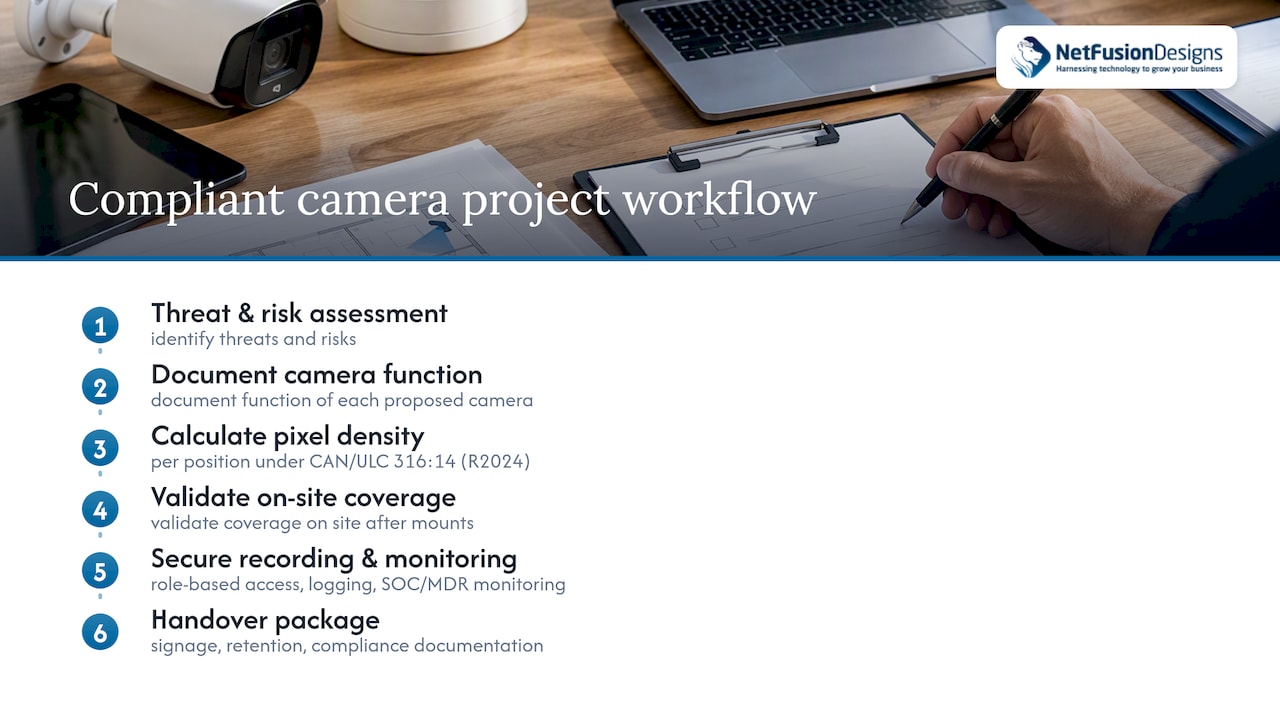
We start every camera project with a threat and risk assessment, then document the function of each proposed camera before anyone touches a drill. From there, we calculate pixel density for each position, covered under CAN/ULC 316:14 (R2024) performance expectations, and validate coverage on site once mounts go up. We secure the recording hardware with role-based access and logging, and our 24/7 SOC and MDR team can monitor for tamper and intrusion events. Every project closes with a handover package covering signage placement, retention policy, and the compliance documentation a regulator or insurer might ask to see.
Most guides treat camera placement as a hardware problem: buy more megapixels, add more cameras, cover more square footage. The guidance from regulators and standards bodies points the other way. Pixel density at the one spot where identification actually matters, your entrance or your till, beats blanket 4K coverage of a parking lot nobody will ever need to zoom into.
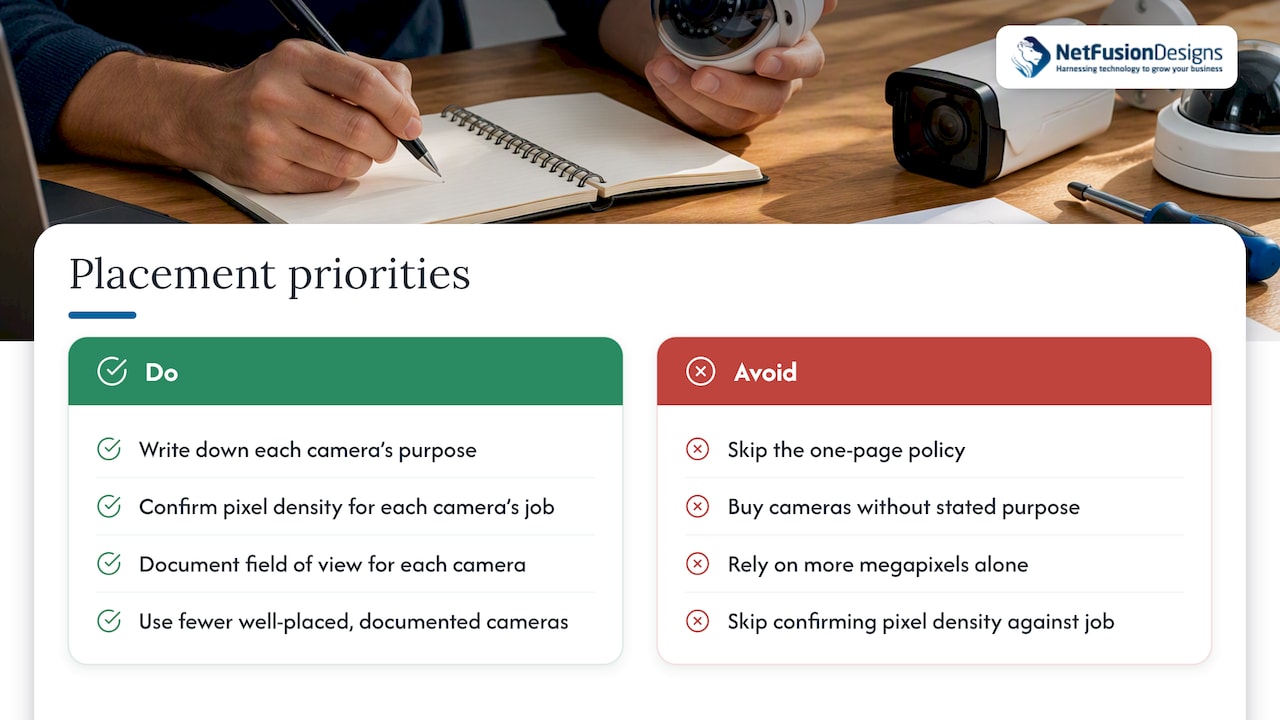
The bigger blind spot isn’t physical, it’s procedural. Businesses buy cameras and skip the one-page policy that names each camera’s purpose and field of view, which is exactly the document a regulator or an insurer asks for first. A system with five well-placed, well-documented cameras holds up better, legally and practically, than fifteen cameras nobody can explain.
If you’re starting from scratch, prioritize in this order: write down why each camera exists, confirm its pixel density against its actual job, then worry about the hardware spec sheet. Skipping straight to hardware is the single most common mistake we see.
— Geeshan
We design, install, and manage security camera systems as part of managed IT services, providing monitoring, access controls, and documentation discipline for your camera network.

This article is general information, not a substitute for advice from a qualified lawyer. Consult a qualified legal professional about your own circumstances before acting on anything here.
Cover entrances and exits, point of sale and cash handling areas, blind corners, loading docks, and your parking perimeter first. Each camera’s exact position should match a specific objective, such as identifying faces at a till, confirmed using pixel density planning rather than resolution alone.
Avoid washrooms, change rooms, and any space where people have a clear expectation of privacy, along with angles that capture public sidewalks or a neighbour’s property. Ontario’s IPC guidance recommends disabling pan and zoom where they would sweep in personal information beyond your documented purpose.
Put your strongest coverage at the main entrance and the register, since those two points carry the most identification value for loss prevention and dispute resolution. A small shop typically needs one to three entrance cameras and one or two covering the till, plus a handful more for aisles and the stockroom.
No. Privacy guidance from the Office of the Privacy Commissioner of Canada treats capturing a neighbour’s property or a public sidewalk as collection beyond what’s necessary, and a past OPC investigation ordered a business to relocate cameras for exactly this reason. Adjust the angle or add a privacy mask so your field of view stays inside your own property line.
The right number comes from mapping your entrances, cash points, and blind corners, not from a fixed formula. A small office often needs coverage at the main entrance, shared reception, and any door guarding sensitive records, while a small retail space generally runs two to six indoor cameras once entrances and registers are covered.
%20(1).avif)
%201.avif)